Data Encryption using GPG!
Securing Your Privacy
The importance of securing your data has become critical in the modern digital era. This post explores a versatile tool called GnuPG, or GNU Privacy Guard, which allows you to encrypt your data and communications, ensuring that only the intended recipients can access them.
Asymmetric Encryption
Before looking at GPG, let’s first review some encryption approaches. A very naive approach to sharing encrypted files is to use the same secret key between a sender and a receiver. This approach is known as symmetric encryption. However, the symmetric approach has a limitation in that it requires a secure method for key exchange.
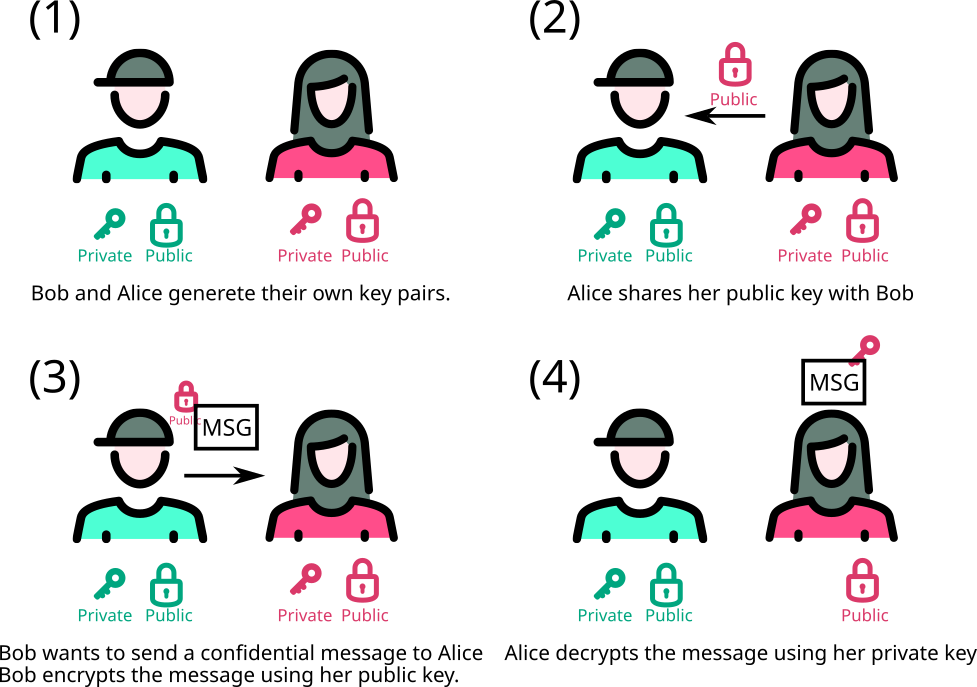
To address this issue, asymmetric encryption is preferred. Asymmetric encryption, also known as public-key cryptography, is a method of encryption that uses a pair of keys: a public key and a private key, to encrypt and decrypt data. The public key is used for encryption. It is openly shared and can be distributed to anyone, allowing anyone to encrypt a message intended for the key owner. The private key is used for decryption. It is kept secret and known only to the owner, allowing the key owner to decrypt messages that were encrypted with the corresponding public key.
This is how asymmetric encryption works:
-
Key Pair Generation:
- A user generates a pair of keys: one public and one private.
- The public key is shared widely, while the private key is kept secure.
-
Encryption:
- When someone wants to send a secure message, they use the recipient’s public key to encrypt the message.
- This ensures that only the recipient, who has the corresponding private key, can decrypt and read the message.
-
Decryption:
- The recipient uses their private key to decrypt the received message.
- The private key is the only key that can decrypt the message encrypted with the corresponding public key.

How to Use GPG?
- Installation:
sudo apt-get install gnupg # Ubuntu
sudo pacman -S gnupg # Arch- Generate a GPG Key:
gpg --full-gen-key- Export Public Key:
gpg --export --armor your-email@example.com > publickey.asc- Import Public Key:
gpg --import publickey.asc- Encrypt a File:
gpg --output encryptedfile.gpg --encrypt --recipient recipient@example.com file.txt- Decrypt a File:
gpg --output file.txt --decrypt encryptedfile.gpgSinginig/Verifying Files
A detached signature is a separate file that contains the signature of the original file.
gpg --output file.sig --detach-sign file.txtfile.txtis the file you want to sign.file.sigis the signature file generated.
To verify the detached signature:
gpg --verify file.sig file.txtTo sign text files,
gpg --clearsign <file name>- This will create a file called
file.txt.ascwhich contains the original text and the signature.
To verify
gpg --verify <file.asc>A Simple GitHub Verification using ssh with gpg
Generate SSH key
ssh-keygen -t rsaor simplyssh-keygenid_rsa: private keyid_rsa.pub: public key
- Go to SSH and GPG keys in the setting menu of GitHub
- Just paste your public key